


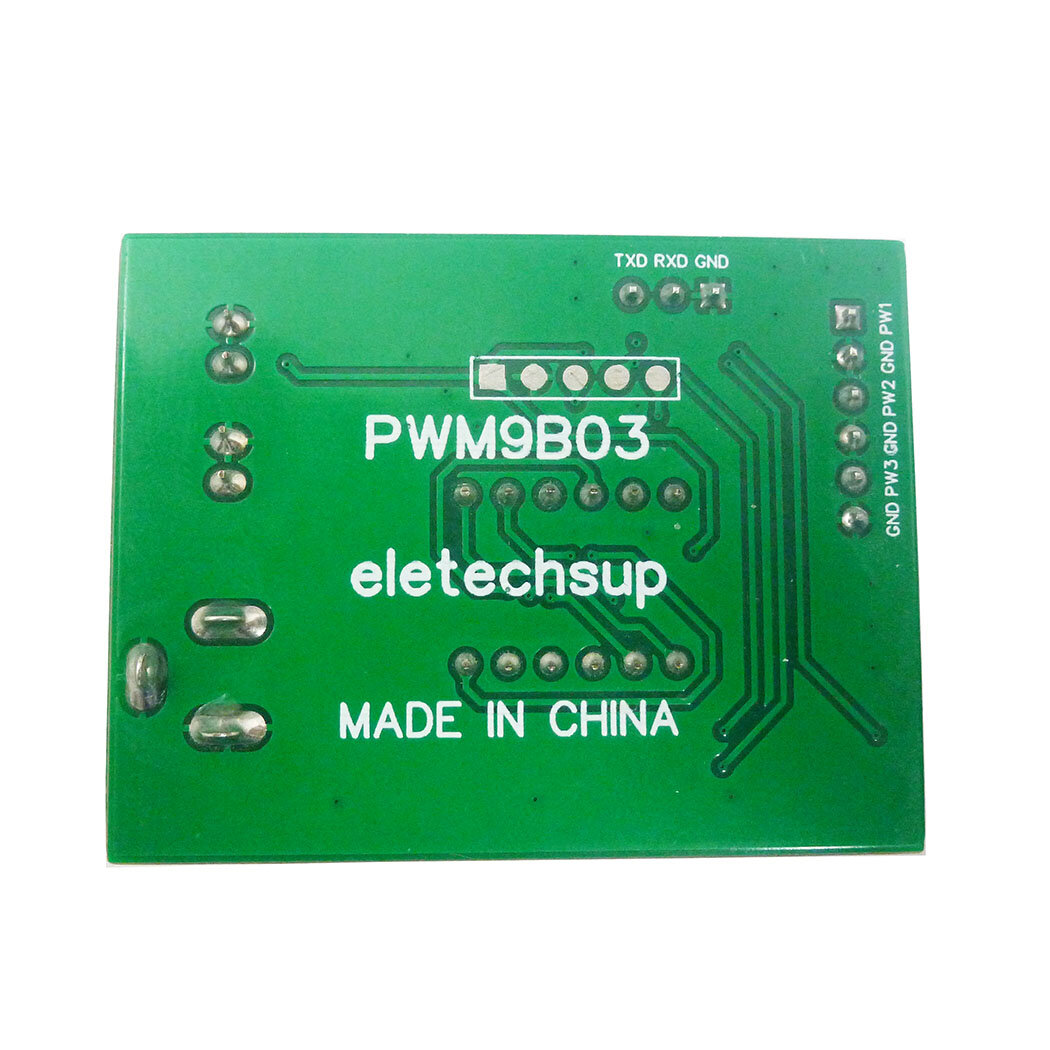

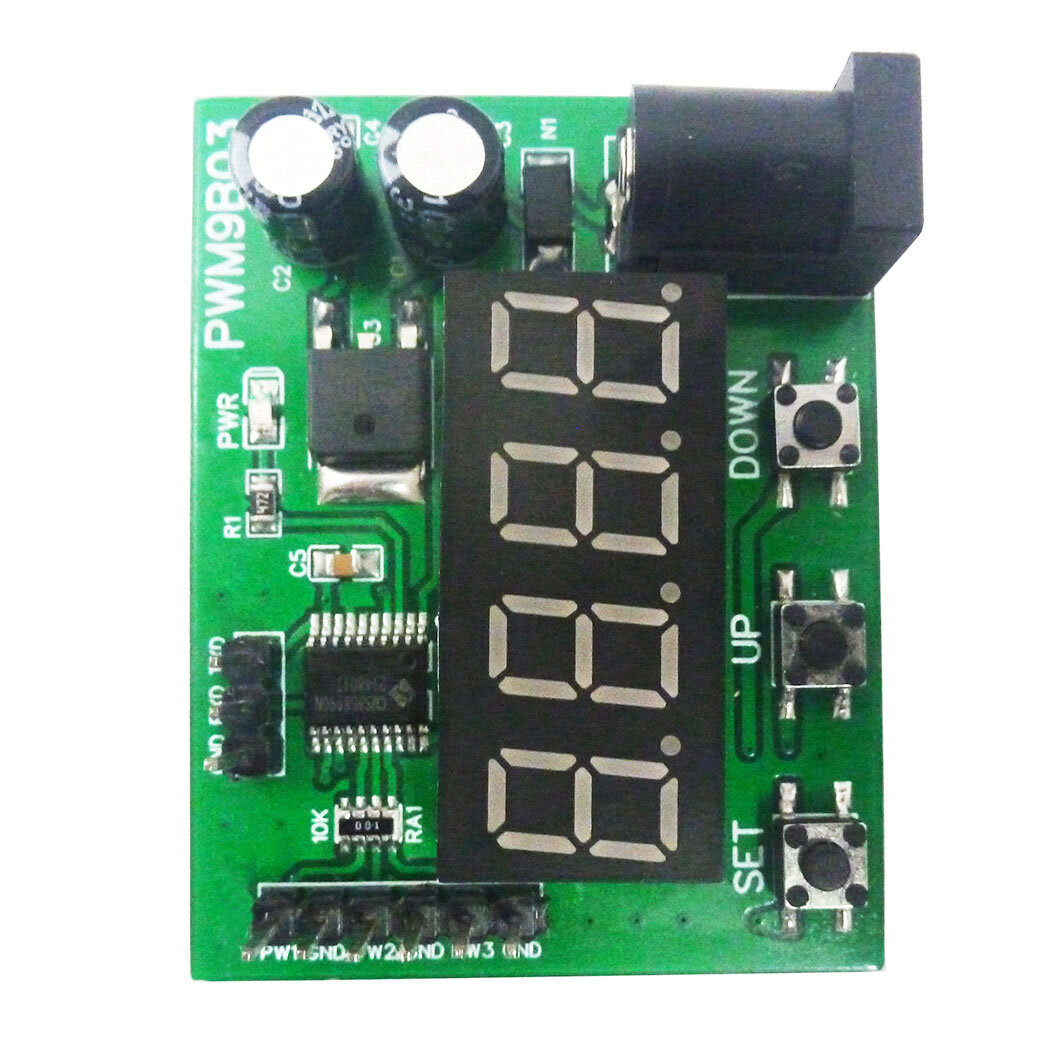
PWM9B03 3-Channel PWM Pulse Signal Generator Module

 Direct purchase from the factory
Taattu Turvallinen Kassa

 Ilmainen Lahja
 Toimitusehdot
 Palautusehdot
Ilmainen Lahja
Tervetuloa Roymalliin, ammattimaiselle verkkosivustollesi korkealaatuisten tavaratalolahjojen ostamiseen. Arvostamme ja kiitämme tukeasi ja haluamme ilmaista kiitollisuuttamme lisäämällä ostoksiisi ylimääräisen säpinän. Kun teet ostoksia kanssamme, et vain nauti korkealaatuisista tuotteista, jotka parantavat elämääsi, vaan saat myös eksklusiivisen ilmaisen lahjan jokaisesta tilauksestasi. Valmiina tutustumaan kokoelmaamme ja löytämään täydelliset lahjasi? Selaa valikoimaamme korkealaatuisia tavaratalotuotteita, tee tilauksesi ja odota iloa ilmaisesta lahjastasi, joka saapuu ostoksesi mukana.Toimitusehdot
Teemme parhaamme toimittaaksemme tuotteesi turvallisesti tilauksesi vastaanottamisen jälkeen. Toimitustiedot toimitetaan vahvistussähköpostissasi.Useimmissa tapauksissa tilaukset käsitellään 2 päivän kuluessa. Poikkeuksellisissa olosuhteissa se voi viivästyä seuraavasti: Kun teet tilauksen lauantaina, sunnuntaina tai pyhäpäivinä, se viivästyy 2 päivää.Normaalisti kuluu 5-7 arkipäivää (maanantaista perjantaihin) ilman lennon viivästystä tai muita ympäristötekijöitä.Koska toimituspalvelumme on maailmanlaajuinen, toimitusajat riippuvat sijainnistasi, joten saattaa kestää jonkin aikaa ja odota kärsivällisesti, jos olet syrjäseuduilla tai maissa.1. Palautus- & Vaihtoehdot
Hyväksymme vain tuotteet, jotka on ostettu roymall.com-sivustolta. Jos ostat paikallisilta jakelijaltamme tai muilta jälleenmyyjiltä, et voi palauttaa niitä meille. Loppuunmyydyt tuotteet tai ilmaiset lahjat eivät ole palautettavissa.Palautettavan tuotteen on oltava käyttämätön ja samassa kunnossa kuin sen vastaanottamishetkellä. Sen on myös oltava alkuperäisessä pakkauksessa.Kun olet saanut palautusohjeet meiltä, pakkaa palautettavat tuotteet ja jätä pakettisi paikalliseen postiin tai toiseen kuljetusliikkeeseen.Käsittelemme palautuksen tai vaihdon tuotteen 3-5 arkipäivän kuluessa sen vastaanottamisesta. Hyvitys käsitellään ja hyvitetään automaattisesti alkuperäiseen maksutapaasi.Mukautettuja tuotteita, mukaan lukien mukautetut koot, värit tai painatukset, ei voida palauttaa tai vaihtaa.Tarvitsetko lisäapua, ota yhteyttä. service@roymall.com tai Whatsapp: +8619359849471
2. Hyvitysehdot
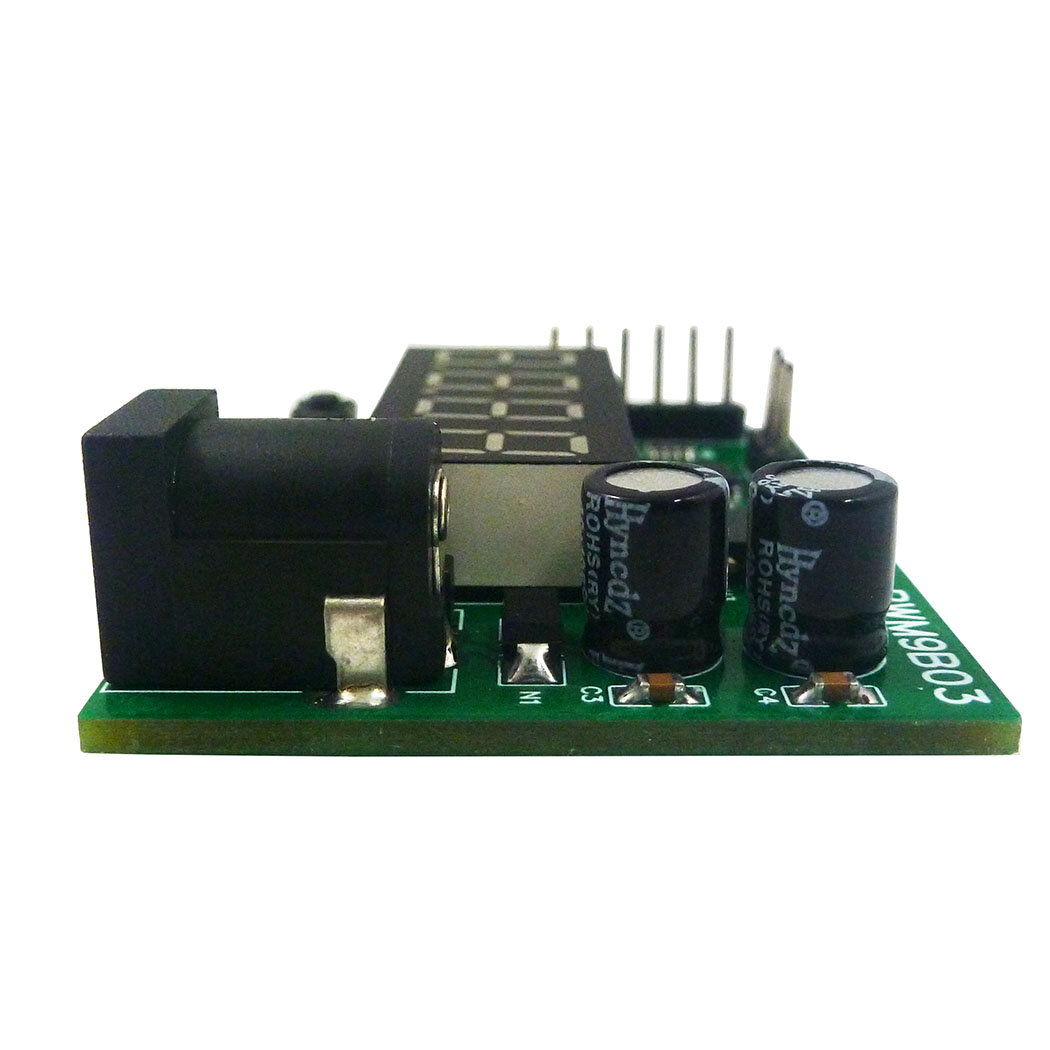
Saat täyden hyvityksen tai 100% kaupan luoton, kun olemme vastaanottaneet ja tarkastaneet palautetun paketin. Hyvitys käsitellään ja hyvitetään automaattisesti alkuperäiseen maksutapaasi.Huomaa, että toimituskulut ja mahdolliset tullit tai maksut eivät ole hyvitettävissä. Lisätoimituskulut eivät ole hyvitettävissä, kun paketti on lähetetty. Olet vastuussa näiden maksujen maksamisesta, emmekä voi vapauttaa tai hyvittää niitä, vaikka tilaus palautettaisiin meille.Kun olemme vastaanottaneet ja vahvistaneet palautetun tuotteen, lähetämme sinulle sähköpostin ilmoittaaksemme, että olemme vastaanottaneet palautetun tuotteen. Ilmoitamme myös hyvityksen hyväksynnästä tai hylkäyksestä.Jos sinulla on ongelmia hyvitysprosessin kanssa, ota yhteyttä. service@roymall.com tai Whatsapp: +86193598494711 Working voltage: DC 6-24V
2 Working current: DC 12-30MA
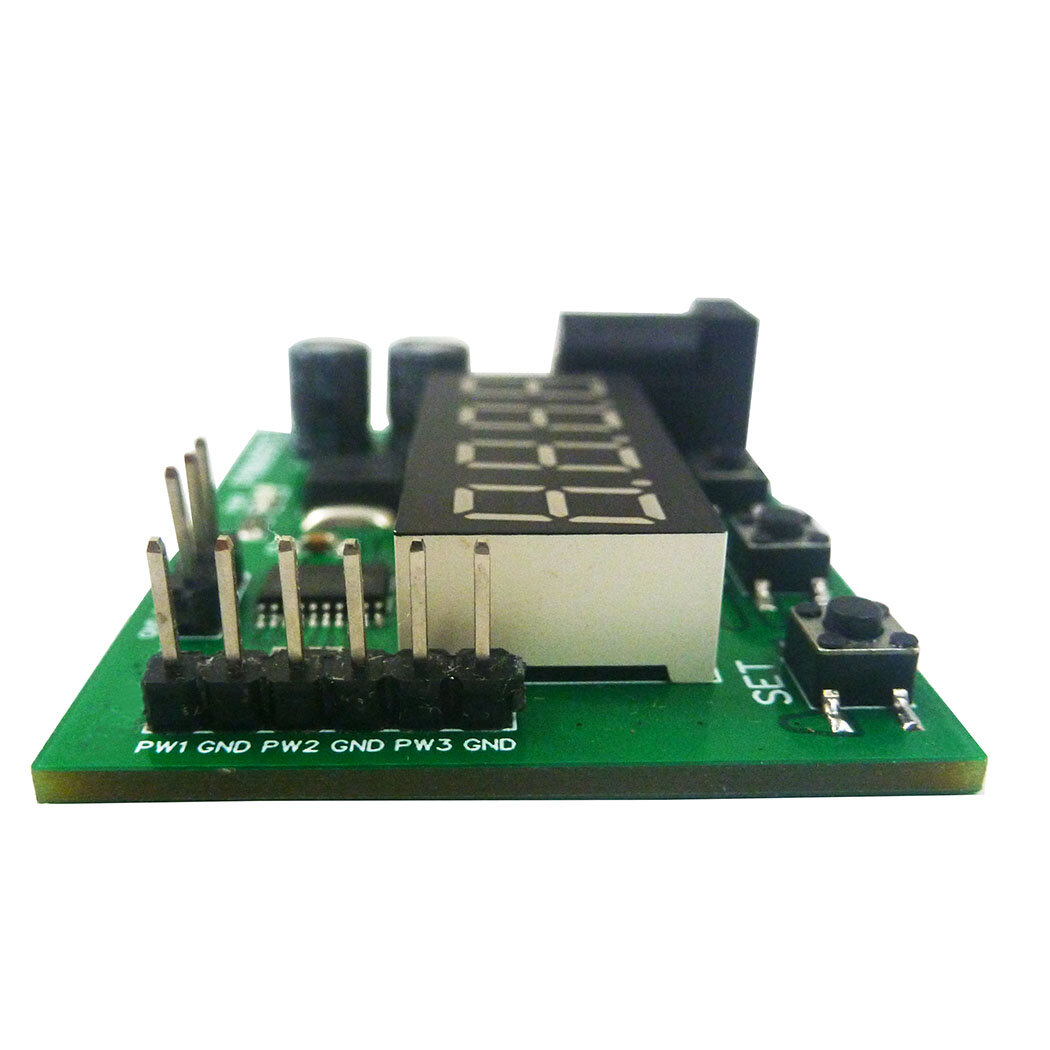
3 3 independent buttons: used to set frequency, duty cycle, working status, etc.;Support long press, short press, simple operation and diverse functions.
4 3 Channels PWM output: PWM Signal can set frequency and duty cycle respectively.
5 PWM signal level: 5V TTL level
6 PWM signal load capacity: <20mA
7 Output frequency accuracy: 0.6% (10-30 Degrees Celsius)
8 Ultra-high frequency range: 20HZ ~ 1MHZ, duty cycle 0-100%.
9. Power-off memory function: power off at any time, the last set data will be recorded and saved when power off, and the data will be displayed when power is turned on again.
10 Automatic exit function: If there is no operation for 36 seconds, the last set data will be automatically recorded, and the dynamic setting state will be exited.
11. Real-time update function: Under the dynamic setting function, you can connect an oscilloscope to grasp the set frequency and duty cycle at any time, and output the precise frequency or duty cycle.
12. Restore production setting function: in dynamic setting mode, press and hold the UP and DOWN buttons at the same time to restore the production setting (after pressing, you need to power off and power on again, the data will be updated to the default data)
13 kinds of application scenarios: The module has a variety of control methods and working modes, and three output channels, which can meet the requirements of different environments.
14 Dimensions: 49 x 38 x 13mm
15 Weight: 14.5g
PWM signal parameter description:
1 PWM frequency: the setting range is 20HZ ~ 1MHZ. The default value is 100HZ.
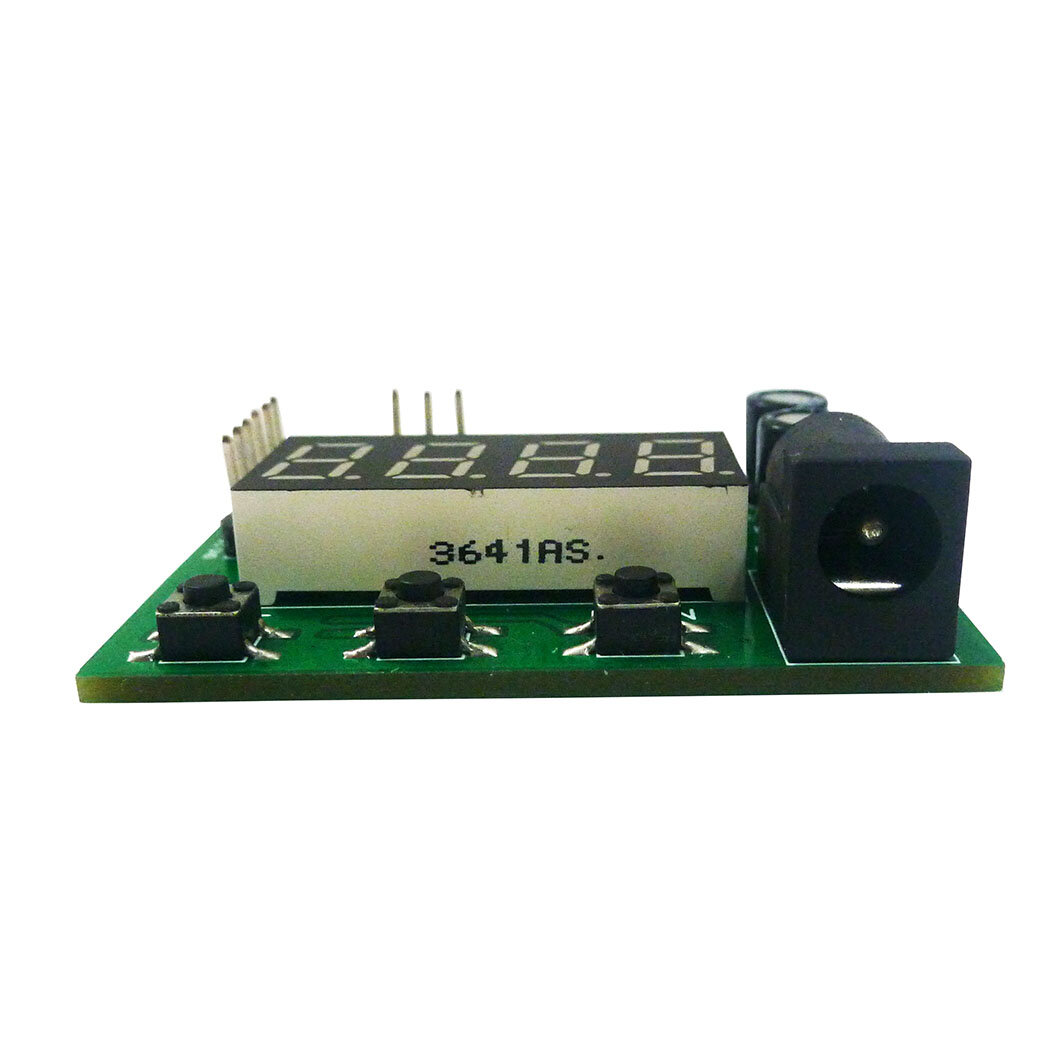
Four-digit digital tube, the decimal determines the unit of frequency. When there is a decimal point, the unit is KHZ, and when there is no decimal point, the unit is HZ.
The relationship between the digital tube display number and the output frequency:
0034: Indicates that the frequency is 34HZ
0234: Indicates the frequency is 234HZ
1234: Indicates the frequency is 1234HZ
1.234 : indicates that the frequency is 1.234KHZ
12.34 : indicates that the frequency is 12.34KHZ
123.4: Indicates the frequency is 123.4KHZ
0.123: Indicates that the frequency is 0.123KHZ (that is, 123HZ)
2 PWM duty cycle: setting range 0 ~ 100
0: The corresponding PWM remains low
100: The corresponding PWM remains high
1 ~ 99: corresponding duty cycle 0.01 ~ 0.99
The relationship between the digital tube display number and the output duty cycle
0005: Indicates that the output duty cycle is 0.05/5%
0050: Indicates that the output duty cycle is 0.50/50%
Note: 1. Other combinations are also possible, but whether the data can be more accurate is related to your test tool
Package include:
1u00d7 Module Board
How to set PWM output parameters:
Example 1:
For example, the parameters of the three channels are 100HZ/50%, 200HZ/60%, 300HZ/70%
View the parameters of the three channels:
1 Powered on PWM9B03 module, the PWR indicator is on, and the digital tube is off
2 Click the SET button to display PF1 (for 1 second), and then normally display 0100 (channel 1 frequency 100HZ)
3 Click the SET button twice to display dU1 (for 1 second), and then normally display 0050 (channel 1 duty cycle 50%)
4 Click the SET button three times to display PF2 (for 1 second), and then normally display 0200 (channel 2 frequency 200HZ)
5 Click the SET button four times, display dU2 (for 1 second), and then normally display 0060 (channel 2 duty cycle 60%)
6 Click the SET button five times to display PF3 (for 1 second), and then normally display 0300 (channel 3 frequency 300HZ)
7 Click the SET button six times, display dU3 (for 1 second), and then normally display 0070 (channel 3 duty cycle 70%)
Example 2:
Set channel 1 to: frequency 1000HZ, duty cycle 40%
1 Powered on PWM9B03 module , the PWR indicator is on, and the digital tube is off
2 Press and hold the SET button for 3-5 seconds, first display PF1 (for 1 second), and then flash the number
3 Click the UP/DOWN button to adjust the number to 1000 (frequency 1000HZ)
4 Press and hold the SET button for 3-5 seconds for the second time, first display dU1 (for 1 second), and then flash the number
5 Click the UP/DOWN button to adjust the number to 0040 (40% duty cycle)
6 Re-power
Example 3:
Set channel 3 to: frequency 10.12KHZ, duty cycle 60%
1 Powered on PWM9B03 module, the PWR indicator is on, and the digital tube is off
2 Press and hold the SET button for 3-5 seconds, first display PF1 (for 1 second), and then flash the number
3 Press and hold the SET button twice for 3-5 seconds, first display dU1 (for 1 second), and then flash the number
4 Press and hold the SET button three times for 3-5 seconds, PF2 will be displayed first (for 1 second), and then the number will flash.
5 Press and hold the SET button four times for 3-5 seconds, first display dU2 (for 1 second), and then flash the number
6 Press and hold the SET button five times for 3-5 seconds, first display PF3 (for 1 second), and then flash the number
7 Click the UP/DOWN button to adjust the number to 1012, and then click the SET button to adjust the number to 10.12 (frequency 10.12KHZ)
8 Press and hold the SET button for 3-5 seconds for six times, first display dU3 (for 1 second), and then flash the number
9 Click the UP/DOWN button to adjust the number to 0060 (60% duty cycle)
10 Re-power
Example 4:
Factory Reset
1 Powered on PWM9B03 module, the PWR indicator is on, and the digital tube is off
2 Press and hold the SET button for 3-5 seconds, first display PF1 (for 1 second), and then flash the number
3 Press the UP and DOWN buttons at the same time to restore the factory settings
4 Re-power


